Homemade chocolate ice cream is pure comfort in a bowl, rich, creamy, and incredibly easy to make. With deep cocoa flavor and a velvety-smooth texture, this no-churn recipe delivers everything you love about a classic chocolate dessert without the need for an ice cream maker or fancy equipment. Just a few simple ingredients and minutes of prep, and you’ll have a decadent treat that tastes like it came from your favorite scoop shop.
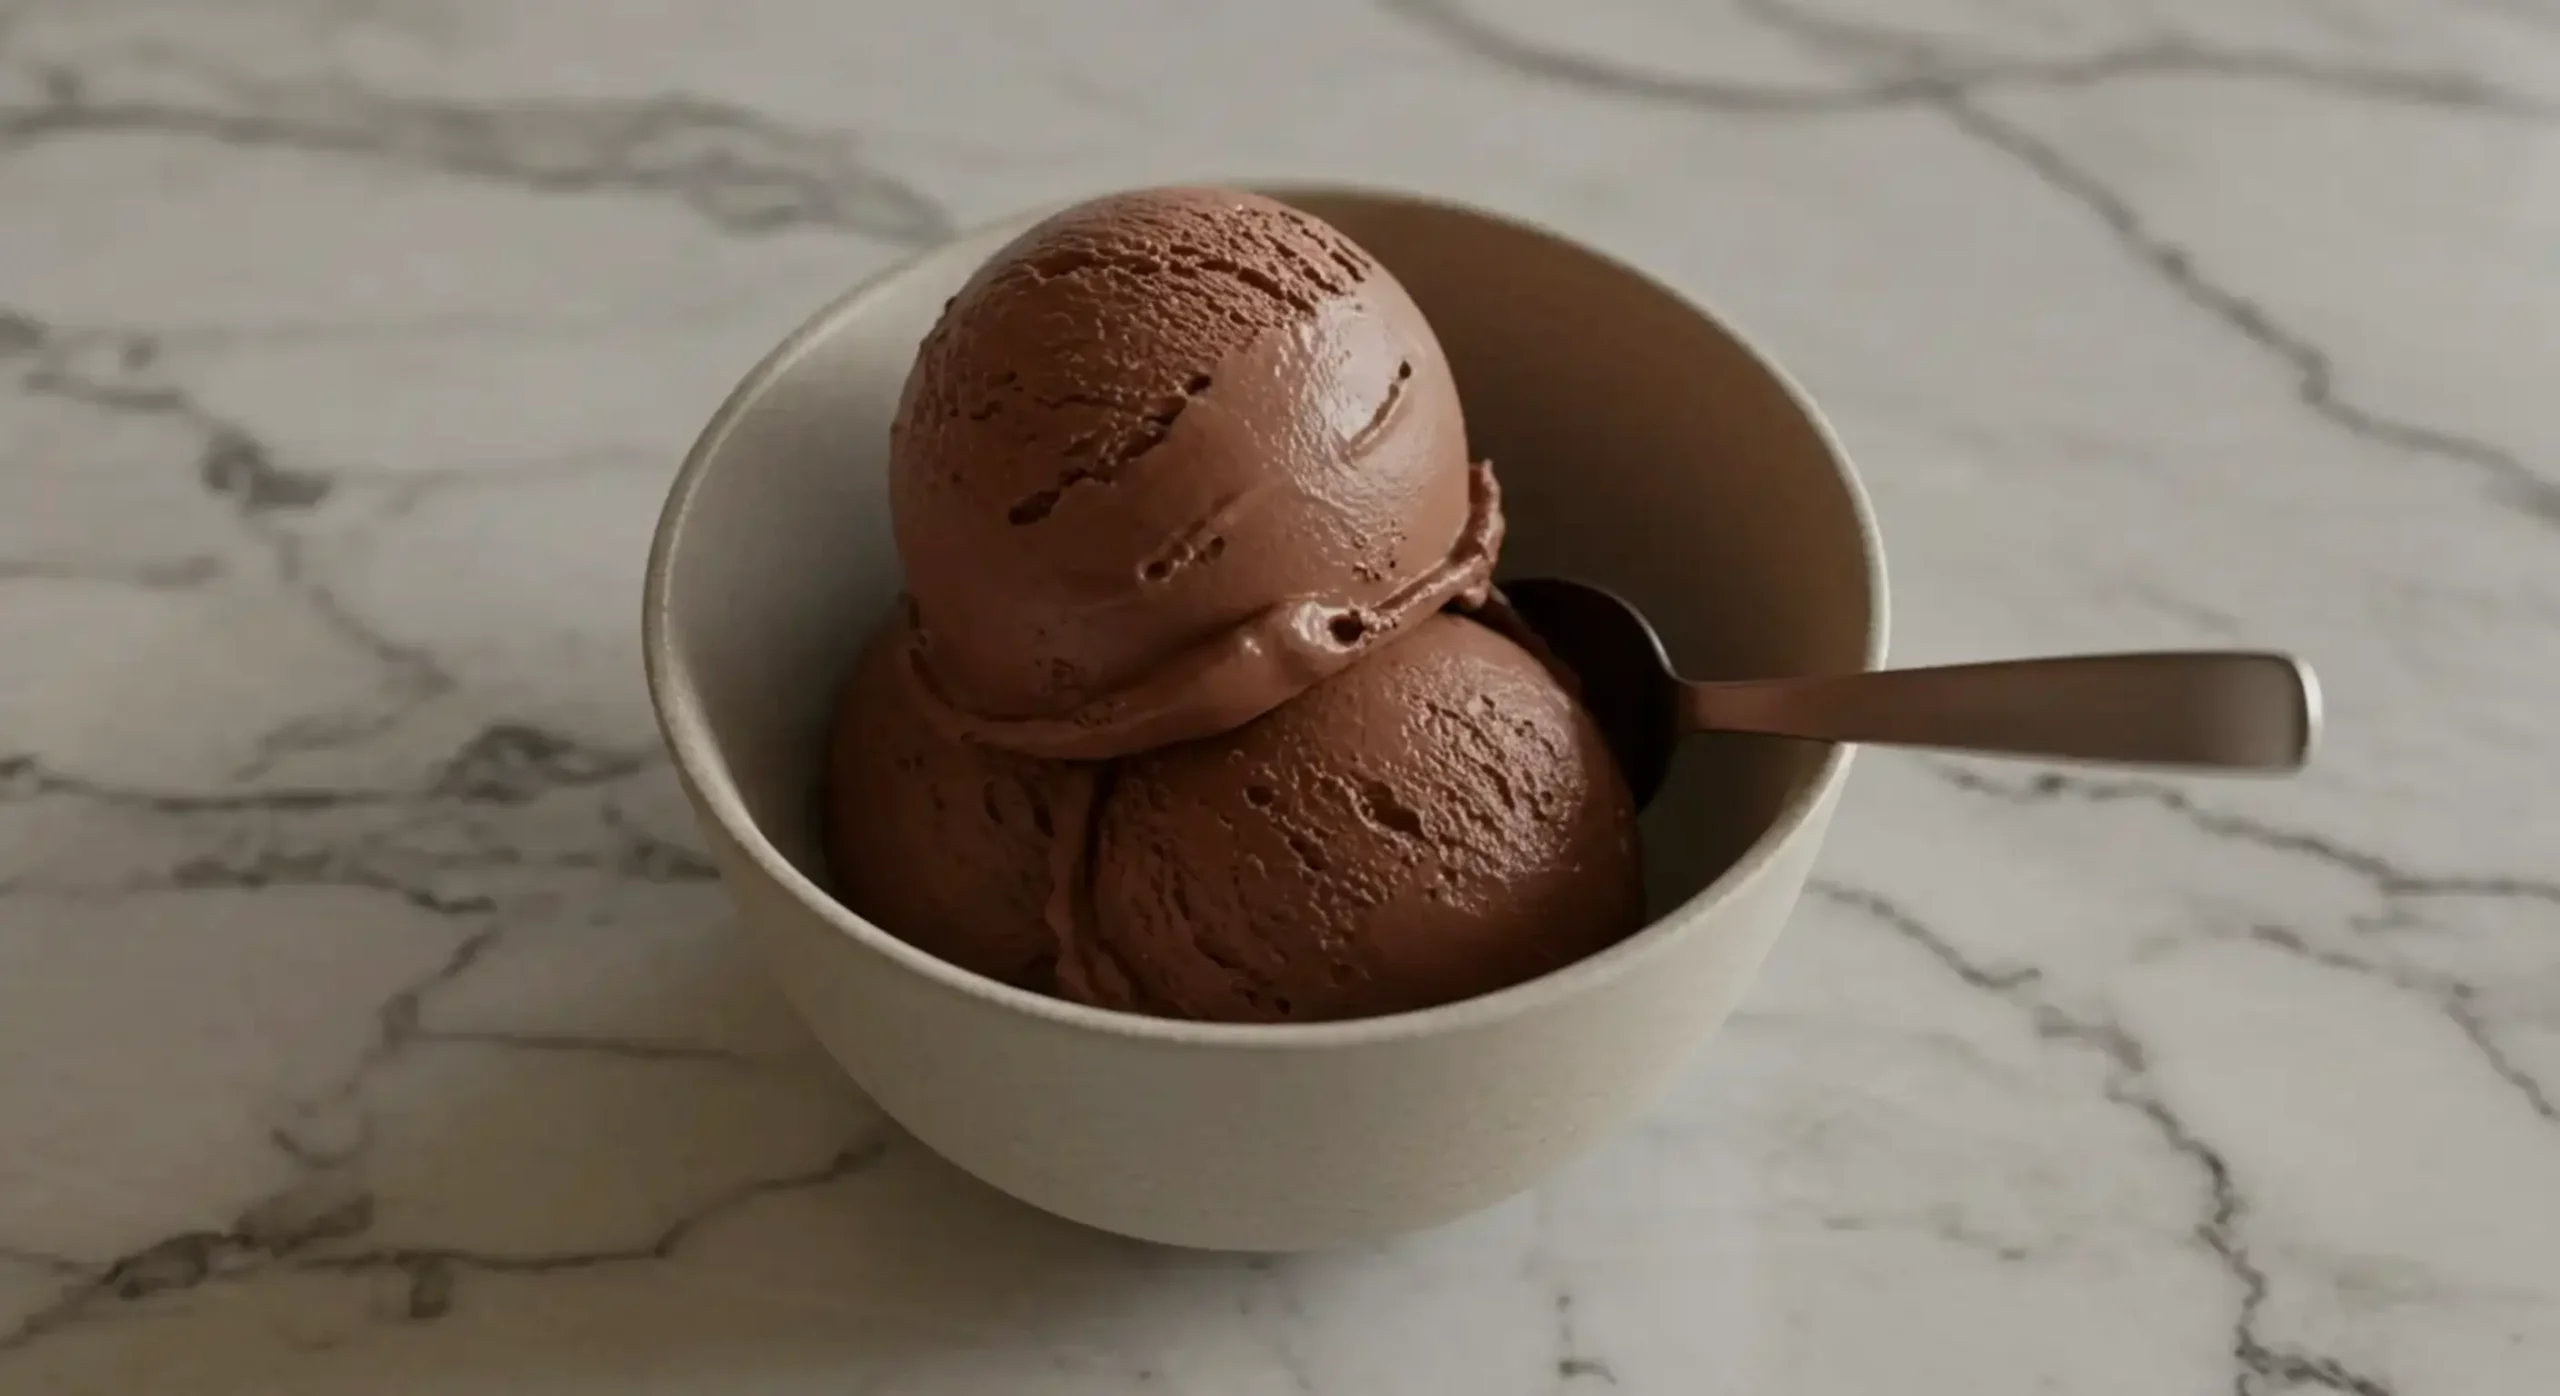
Whether you’re hosting a summer barbecue, planning a family movie night, or just craving something cool and chocolaty after dinner, this is the easy ice cream recipe you’ll keep coming back to. It’s the kind of frozen treat that feels indulgent but doesn’t take much effort, just mix, freeze, and enjoy.
No Ice Cream Machine? No Problem!
If you’ve ever avoided making ice cream at home because you don’t have a machine, this homemade chocolate ice cream is your dream come true. It uses a simple no-churn method that relies on whipped cream and sweetened condensed milk for that ultra-creamy texture. No custard base, no eggs, no stovetop, just a few ingredients and a freezer.
Busy schedule? No worries. The prep takes less than 10 minutes, making it the ultimate dessert hack for weeknights or last-minute guests. Plus, it’s beginner-friendly, so even if you’ve never made ice cream before, this recipe has your back.
The Perfect Quick Ice Cream Recipe for the Whole Family This Summer
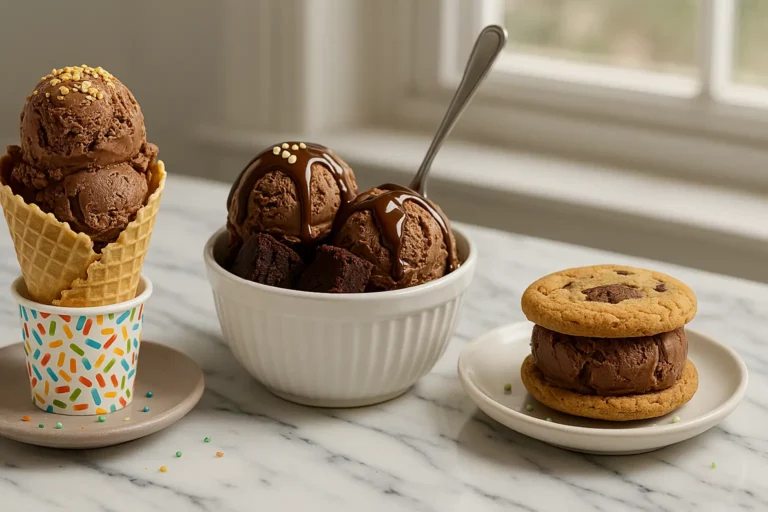
When the temperature rises, nothing beats a cold, creamy scoop of chocolate bliss. This creamy chocolate ice cream isn’t just satisfying, it’s versatile too. You can dress it up with sprinkles, drizzle it with chocolate syrup, or sandwich it between two cookies for a quick frozen sandwich. Even picky eaters will be begging for seconds.
For families, this recipe is a winner. Kids love helping out (especially when it involves licking the spoon), and adults love that it’s both nostalgic and satisfying. It’s also easy to customize, so you can turn it into your go-to summer chocolate dessert idea.
Quick Takeaway: This homemade chocolate ice cream is rich, creamy, and incredibly easy to make without an ice cream machine. It’s perfect for busy families, spontaneous cravings, and sunny days.
Recipe
Ingredients List (For 4 Servings)
Pantry Basics You’ll Need
One of the best things about this chocolate ice cream recipe is that it uses ingredients you probably already have in your kitchen. No complicated shopping list, no obscure components, just a handful of pantry staples that come together to create a surprisingly decadent result.
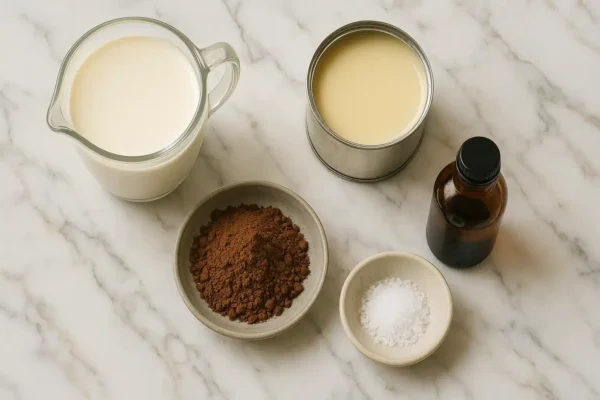
Here’s what you’ll need:
- 2 cups (1 pint) heavy whipping cream – For that light, creamy texture.
- 1 can (14 oz) sweetened condensed milk – Adds sweetness and structure without eggs.
- ½ cup unsweetened cocoa powder – The heart of this rich chocolate dessert.
- 1 tsp pure vanilla extract – For flavor depth and aroma.
- A pinch of salt – Enhances the chocolate and balances the sweetness.
These ingredients form the base of a homemade chocolate ice cream that’s both silky and satisfying. The cocoa gives it that deep chocolate flavor, while the whipped cream ensures every bite is light and spoonable.
The Best Cocoa for a Rich Flavor
When it comes to cocoa, not all powders are created equal. For a truly creamy chocolate ice cream, go for a high-quality unsweetened cocoa powder, either natural or Dutch-processed. Dutch cocoa will give you a smoother, slightly richer taste, while natural cocoa adds a more intense chocolate hit.
Whichever you choose, just make sure it’s unsweetened and sift it beforehand to avoid clumps in your final mix.
Optional Toppings to Make It Your Own
While this easy ice cream recipe is fantastic on its own, it’s also super customizable. Want to jazz it up a little? Try folding in or sprinkling any of these add-ins before freezing:
- Mini chocolate chips or chunks
- Crushed cookies (like Oreos or graham crackers)
- Toasted nuts (almonds or pecans work great)
- A swirl of peanut butter or caramel sauce
You can even keep a topping bar ready so everyone can personalize their scoops, perfect for family nights or dinner parties. It’s a fun way to elevate this already delicious homemade chocolate ice cream.
Ingredient Tip: Chill your mixing bowl and cream before whipping to get maximum volume and smoothness.
Step-by-Step Instructions
Whisk, Fold, and Freeze, That’s It!
This isn’t just a chocolate ice cream recipe; it’s one of the easiest frozen desserts you’ll ever make. No ice cream maker? No problem. All you need is a whisk (or hand mixer), a large bowl, and a freezer-safe container.
Here’s how to make your own homemade chocolate ice cream in just a few minutes of prep:
- Chill your tools. Place your mixing bowl and beaters in the freezer for 10–15 minutes. This helps the cream whip faster.
- Whip the cream. Pour the cold heavy whipping cream into the chilled bowl. Using a hand mixer or stand mixer, beat on medium-high until stiff peaks form (about 3–4 minutes).
- Make the chocolate base. In a separate bowl, whisk together the sweetened condensed milk, cocoa powder, vanilla, and a pinch of salt until smooth and glossy.
- Fold gently. Using a silicone spatula, gently fold the whipped cream into the chocolate mixture in batches. Don’t overmix, just enough to combine and keep the texture airy.
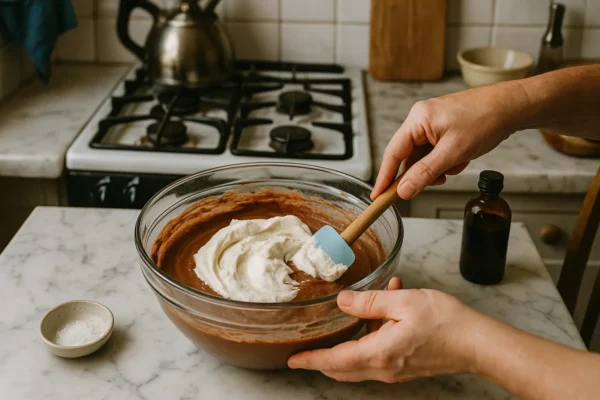
- Pour and freeze. Transfer the mixture into a loaf pan or airtight container. Smooth the top with a spoon or spatula. Cover with plastic wrap and freeze for at least 6 hours, or overnight for the best consistency.
Tips for Ultra Creamy Chocolate Ice Cream
- Use full-fat cream for the creamiest result. Light cream won’t whip properly.
- Avoid overmixing during the folding step—this keeps your ice cream light and smooth.
- Want a deeper chocolate hit? Add 1–2 tablespoons of melted dark chocolate into the cocoa mixture before folding in the cream.
The result? A dreamy, creamy chocolate ice cream with a texture that rivals any store-bought pint. And you did it in under 15 minutes of hands-on time!
Storage Tips for Leftovers
Store your homemade chocolate ice cream in an airtight container, ideally with a layer of parchment paper pressed onto the surface. This prevents ice crystals from forming. It will stay fresh in the freezer for up to 2 weeks, though we doubt it’ll last that long!
For best scooping, let it sit at room temperature for 5–10 minutes before serving.
Time-Saving Tip: Make a double batch and store half for later. You’ll thank yourself next time the craving hits.
Creative Variations & Serving Suggestions
Mocha, Mint, or Chili Chocolate Twists
This homemade chocolate ice cream is incredibly versatile, you can tweak the flavor to match your mood or surprise your guests with something unexpected. Here are a few fun and delicious variations to try:
- Mocha Ice Cream: Add 1 tablespoon of instant espresso powder to the cocoa-condensed milk mixture for a smooth coffee kick. Perfect for adults who want a dessert with depth.
- Mint Chocolate Chip: Stir in ½ teaspoon of peppermint extract and fold in mini chocolate chips. Refreshing, cool, and kid-approved!
- Spicy Chocolate: Feeling bold? Add a pinch of cayenne pepper or chili flakes for a Mexican hot chocolate-style twist. It’s a sweet treat with a slow, warming finish, ideal for evening desserts.
Each variation keeps the creamy base intact while turning your chocolate ice cream recipe into something new and exciting.
Fun Ways to Serve (Cups, Cones, Sandwiches)
Now let’s talk about presentation, because creamy chocolate ice cream is even better when it looks as good as it tastes. Whether you’re hosting or treating yourself, here are a few serving ideas that elevate your frozen creation:
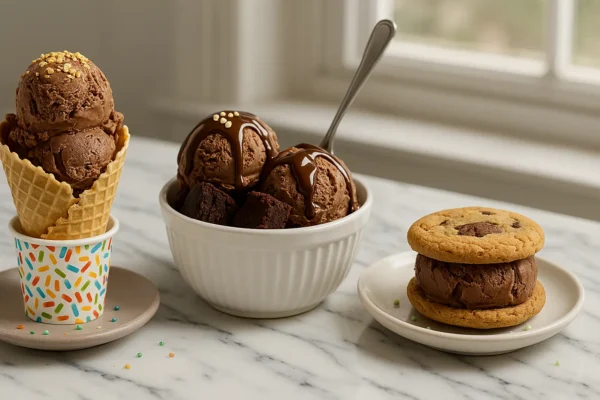
- Classic Scoops in Cones: Use waffle or sugar cones, and top with rainbow sprinkles or chopped nuts.
- Ice Cream Sandwiches: Scoop between two chocolate chip cookies or graham crackers. Wrap in wax paper and freeze for grab-and-go treats.
- Dessert Jars: Layer scoops with crushed brownies, whipped cream, or caramel drizzle in small mason jars. Great for parties and portion control!
Pair It With Brownies or Cookies
Take your dessert to the next level by pairing this rich chocolate dessert with a warm base:
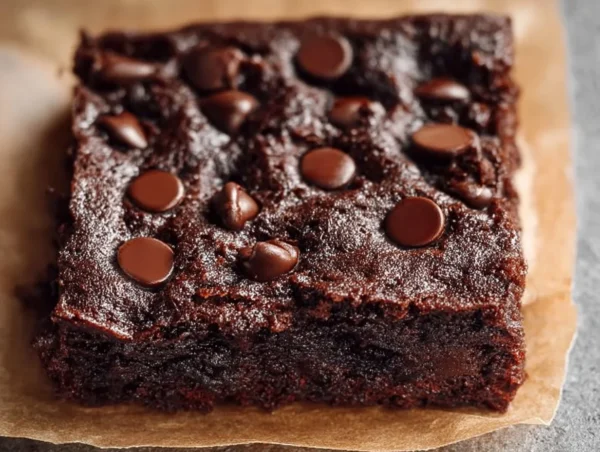
- A gooey brownie + a scoop of cold ice cream = pure heaven.
- Chocolate ice cream on top of fresh-baked oatmeal cookies? Irresistible.
- You can even drop a scoop into a hot espresso for a homemade affogato twist!
This is where easy ice cream recipe meets elegant dessert with zero extra stress. No matter how you serve it, it’s sure to be a hit with everyone at the table.
Pro Tip: Hosting a gathering? Set up a DIY sundae bar with sauces, toppings, and cones so guests can customize their own scoops.
Nutrition Facts & Time Breakdown
Calories, Sugar, and Fat (Per Serving)
Curious about what’s inside each scoop of this creamy chocolate ice cream? While this treat is definitely indulgent, it’s also made with real, simple ingredients, so you know exactly what you’re enjoying.
Here’s the estimated nutritional breakdown for 1 serving (out of 4 total):
These values may vary slightly depending on the brand of cocoa or cream you use, but they offer a solid estimate. Want to know how cocoa and dairy fit into a healthy lifestyle? Harvard’s Nutrition Source has the answers.
For a lighter version, you could experiment with lower-fat cream or unsweetened almond milk whipped topping, though the result won’t be quite as rich.
Prep Time vs Chill Time
If you’re planning dessert for the evening or prepping ahead for guests, here’s what to expect timing-wise:
While the freezing takes several hours, your actual hands-on time is under 15 minutes, which is what makes this the ultimate easy ice cream recipe for busy days or last-minute cravings.
Planning Tip: Prep this homemade chocolate ice cream in the morning, and it’ll be ready by dinnertime, no machine needed, no stress involved.
Wrap-Up & More Ice Cream Ideas
We hope this homemade chocolate ice cream brings a little extra joy to your kitchen, whether it’s your first time making ice cream or your tenth! If you gave it a try, we’d love to hear how it turned out. Leave a comment, or share your favorite mix-ins below to help others in the community.
Better yet, snap a pic and tag us on social! Your creations might just inspire someone else to make their own creamy chocolate ice cream at home.
Try These Other Quick Frozen Treats
If you’re in love with easy frozen desserts, don’t stop here! Check out these other CookMinutes.com recipes that deliver big flavor with minimal effort:
- Easy Lime Sorbet Recipe | Refreshing Dairy-Free Dessert.
- Frozen Yogurt Bark with Berries – A crunchy, fruity snack that kids and adults adore.
- No-Churn Vanilla Bean Ice Cream – A perfect blank canvas for toppings, sauces, or sandwiches.
These treats are all about speed, simplicity, and satisfaction, just like this easy ice cream recipe. Browse our Blog for even more inspiration.
Quick Recap: In under 15 minutes of prep, you’ve created a rich, creamy, no-churn chocolate ice cream that’s sure to impress. Simple ingredients. Zero stress. Maximum flavor.
And remember, the best part of making your own chocolate ice cream recipe isn’t just the taste, it’s the joy of saying, “I made this!”
FAQs – All About Homemade Chocolate Ice Cream
Can I make chocolate ice cream without an ice cream maker?
Absolutely! This homemade chocolate ice cream recipe is designed to be 100% no-churn. You don’t need any machine at all—just a hand mixer (or a whisk if you're motivated), a bowl, and a freezer. The secret is in using whipped cream and sweetened condensed milk, which together create a rich, scoopable texture without any need for churning.
What kind of cocoa powder should I use?
For a deep, chocolatey flavor, go with unsweetened cocoa powder—either natural or Dutch-processed. Dutch cocoa gives you a smoother, more balanced taste, while natural cocoa adds a slightly more intense edge. Just make sure it’s sifted well to avoid clumps in your final mix.
How long does homemade chocolate ice cream last in the freezer?
Stored properly in an airtight container, your creamy chocolate ice cream will stay fresh for up to 2 weeks. Pressing a piece of parchment paper or plastic wrap directly onto the surface will help prevent ice crystals and keep the texture smooth. After that, it may still be safe to eat, but the flavor and consistency might not be as satisfying.
Can I substitute milk for heavy cream?
Technically yes, but the result won’t be the same. Heavy cream whips into stiff peaks and gives this recipe its light and airy texture. Using regular milk (even whole milk) will make the mixture too thin, resulting in a denser, icier product. For best results, stick to heavy whipping cream.
How do I make chocolate ice cream creamier?
Great question! To make your chocolate ice cream recipe even creamier, try these tips:
- Use cold heavy cream and a chilled mixing bowl.
- Fold the whipped cream gently into the cocoa base—don’t stir.
- Let the mixture freeze slowly (overnight is ideal).
- Add 1–2 tablespoons of melted dark chocolate for a silky texture boost.
Homemade Chocolate Ice Cream Recipe
5 Stars 4 Stars 3 Stars 2 Stars 1 Star
No reviews
Rich, creamy, and easy no-churn chocolate ice cream made with just 5 ingredients—perfect for summer and weeknight cravings.
- Total Time: 6 hours
- Yield: 4 servings 1x
Ingredients
2 cups heavy whipping cream
1 can (14 oz) sweetened condensed milk
1/2 cup unsweetened cocoa powder
1 tsp pure vanilla extract
Pinch of salt
Instructions
Chill your mixing bowl and beaters for 10–15 minutes.
In the chilled bowl, beat the heavy cream until stiff peaks form.
In another bowl, whisk together the sweetened condensed milk, cocoa powder, vanilla, and salt until smooth.
Gently fold the whipped cream into the chocolate mixture in batches. Do not overmix.
Transfer the mixture to a loaf pan or airtight container. Smooth the top and cover with plastic wrap.
Freeze for at least 6 hours, or overnight, before serving.
Notes
Store covered in the freezer for up to 2 weeks. Let soften at room temperature for 5–10 minutes before scooping. Customize with chocolate chips, nuts, or a swirl of caramel.
- Author: Sarah Mitchell
- Prep Time: 10 minutes
- Cook Time: 0 minutes
- Category: Dessert
- Method: No-Churn
- Cuisine: American
Nutrition
- Serving Size: 1 scoop
- Calories: 350
- Sugar: 30g
- Sodium: 90mg
- Fat: 24g
- Saturated Fat: 15g
- Unsaturated Fat: 8g
- Trans Fat: 0g
- Carbohydrates: 32g
- Fiber: 2g
- Protein: 5g
- Cholesterol: 85mg




No comment yet, add your voice below!