Hello Kitty two tier cake isn’t just a dessert—it’s the showstopping centerpiece of any celebration. With its cute charm, playful elegance, and iconic style, a Hello Kitty two tier cake instantly elevates birthdays, baby showers, and themed events. Paired with a matching cake topper, this design brings fun, nostalgia, and a touch of magic to every party.
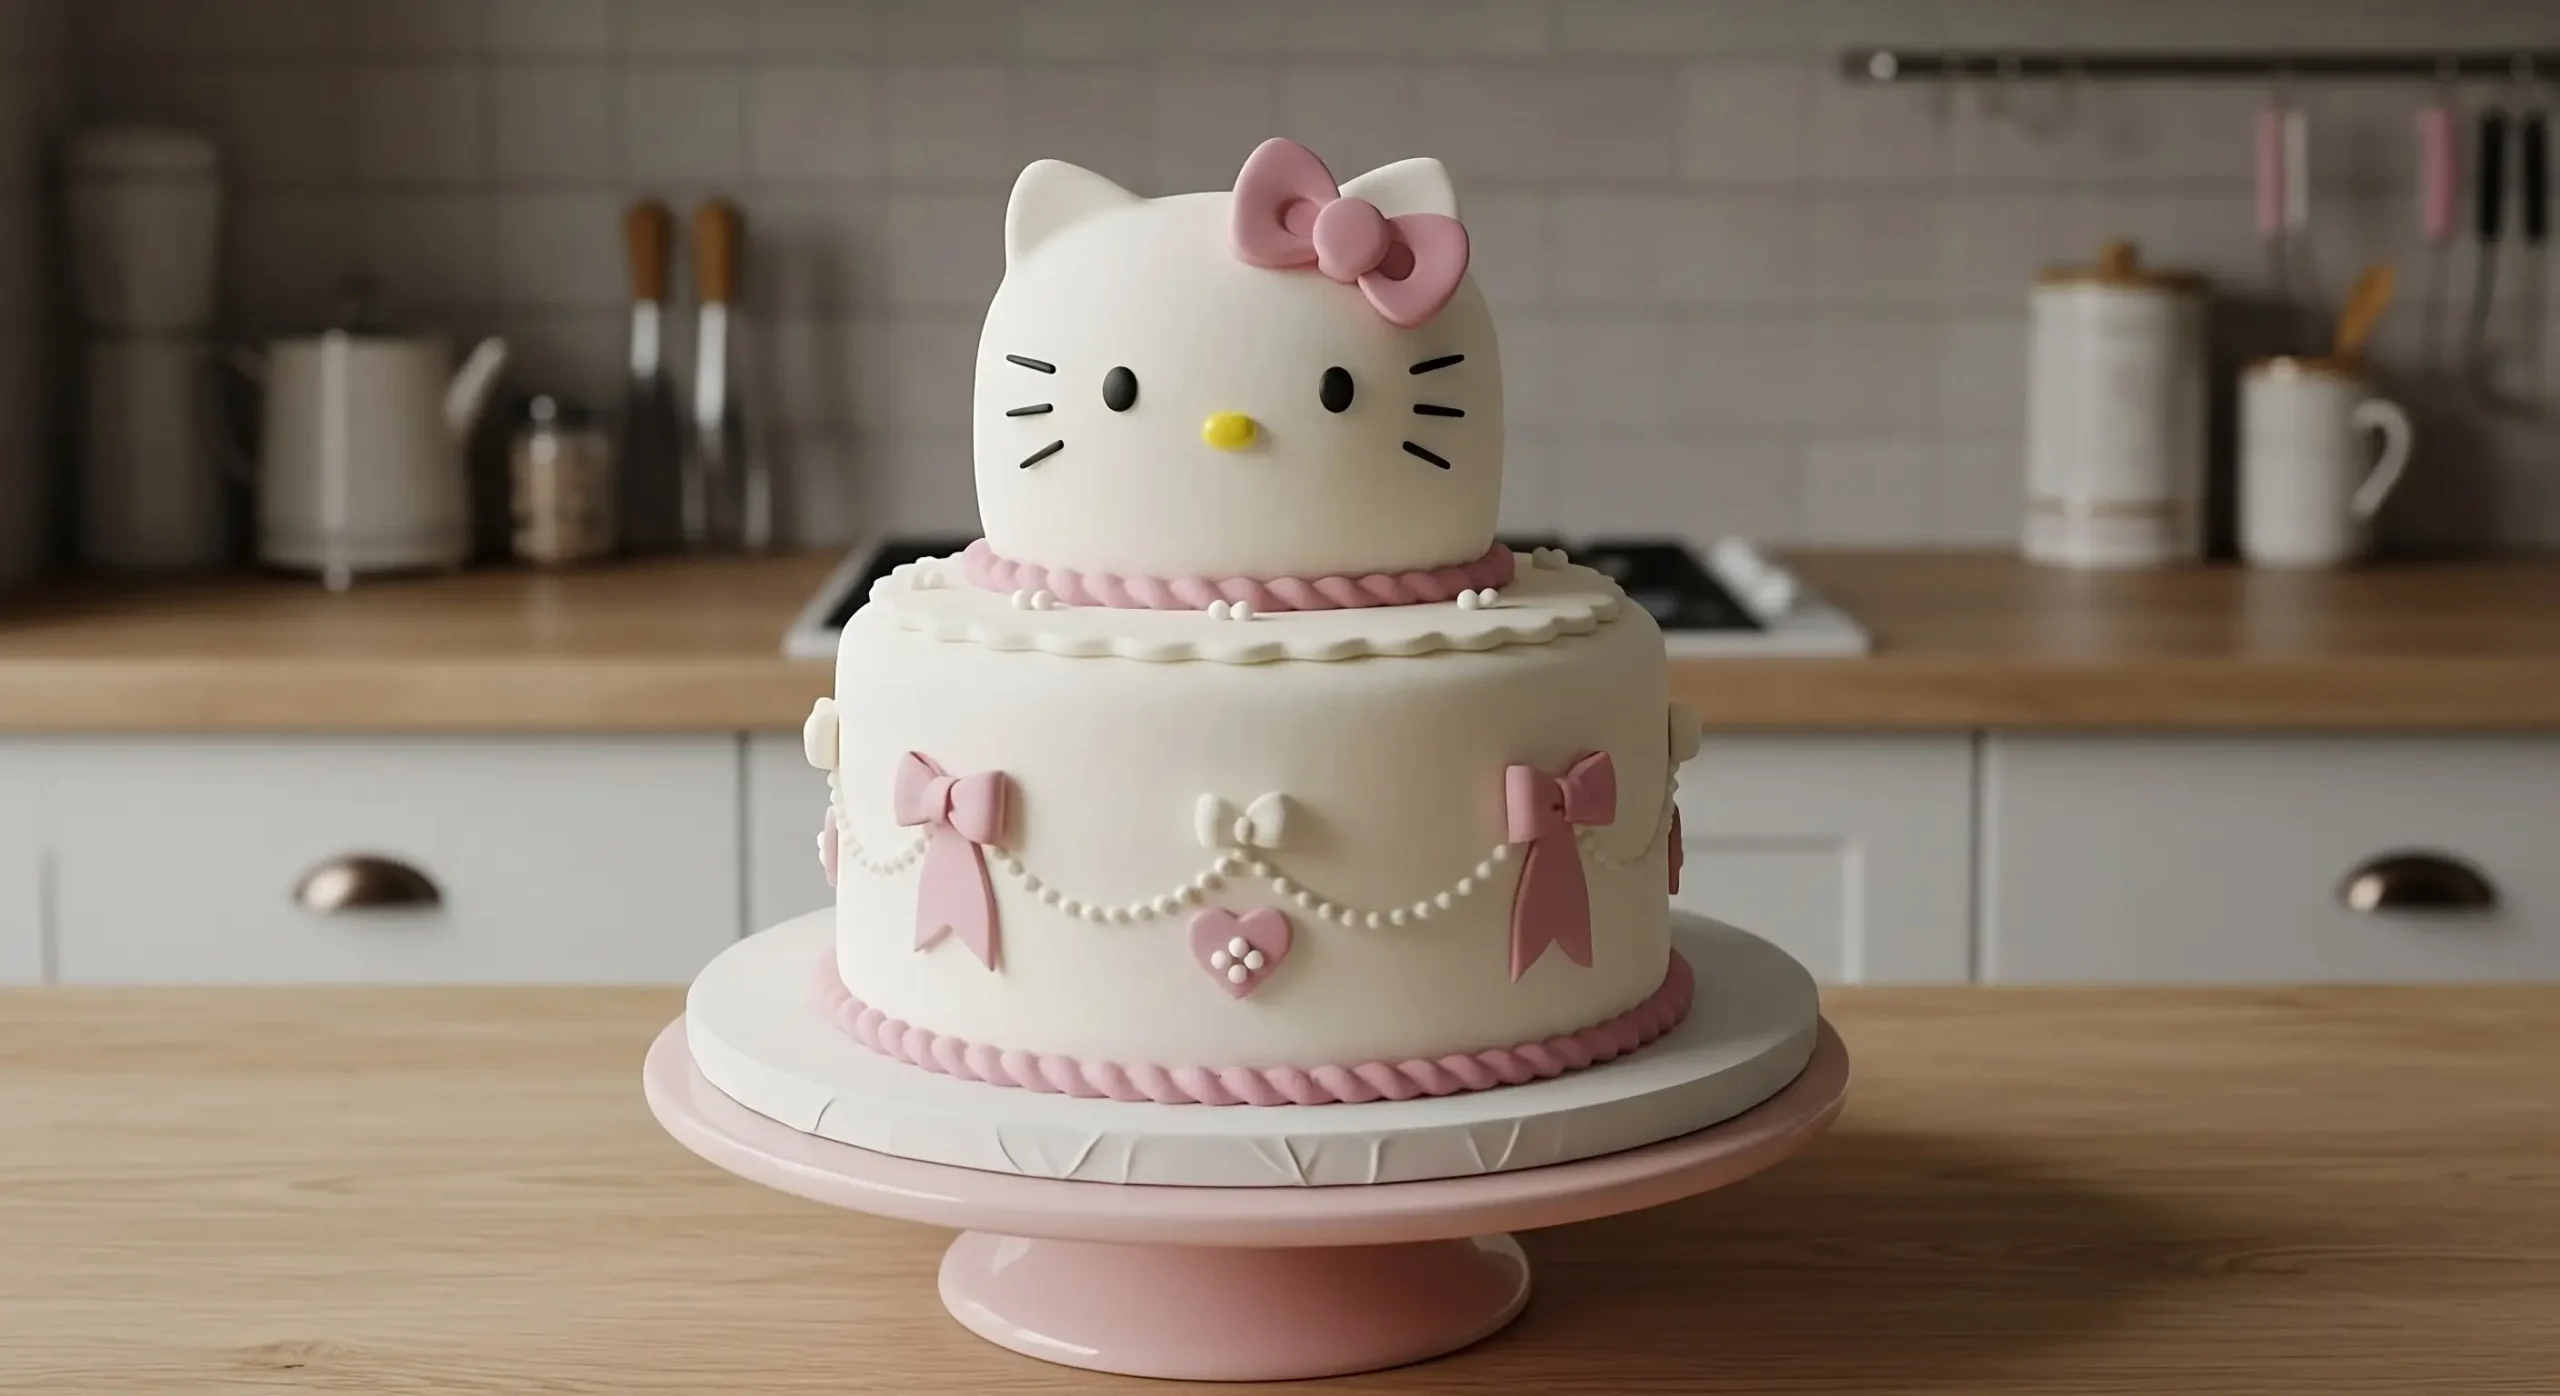
Hello Kitty two tier cake designs bring together charm and creativity—whether you’re aiming for something adorable or elegantly themed. This cake delivers both, making it unforgettable for guests of all ages and a guaranteed showstopper at any event.
But what makes a Hello Kitty two tier cake so special? First, its layered structure draws attention immediately, adding height and dimension to your dessert table. It also opens the door to endless decoration possibilities: pastel colors, sugar bows, edible pearls, and more. Add a Hello Kitty cake topper, and the entire look comes together with that iconic kawaii flair.
In this step-by-step guide, you’ll learn exactly how to create your own Hello Kitty two tier cake from scratch. We’ll walk you through choosing the right ingredients and tools, baking each tier to perfection, assembling the structure safely, and decorating it like a pro. You’ll also learn how to match your topper to your party theme for a truly cohesive look.
By the end, you’ll have a stunning Hello Kitty two tier cake that not only delights visually but creates memories that last. Ready to make cake magic? Let’s get started!
Essential Ingredients & Tools for a Stunning Hello Kitty Two Tier Cake
Creating a Hello Kitty two tier cake isn’t just about baking—it’s about bringing a joyful, creative vision to life! Whether you’re making this cake for a birthday, baby shower, or special celebration, getting the right ingredients and tools is the first step to success. This section will guide you through everything you need before you start mixing, frosting, and decorating.
Ingredients for a Perfect Hello Kitty Two Tier Cake
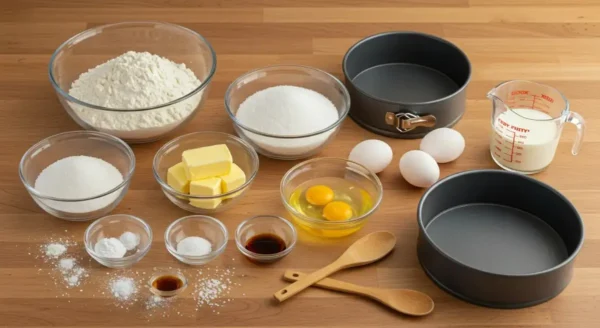
A delicious cake starts with quality ingredients. Below, you’ll find everything needed to create a light, fluffy, and flavorful cake that holds up beautifully under frosting and fondant.
Cake Base Ingredients (For Two Tiers: 6-inch & 8-inch Cake)
To build a strong yet soft cake, you’ll need:
- 2 cups (250g) all-purpose flour – The base that gives structure while keeping it soft.
- 1 ½ teaspoons baking powder – Ensures your cake rises evenly and stays fluffy.
- ¼ teaspoon salt – Balances flavors and enhances the sweetness.
- ½ cup (115g) unsalted butter, softened – Adds moisture and a rich taste.
- 1 cup (200g) granulated sugar – Sweetens the cake perfectly.
- 2 large eggs – Helps bind the ingredients and creates a smooth texture.
- 1 teaspoon vanilla extract – Adds warmth and depth to the flavor.
- ½ cup (120ml) milk (or dairy alternative) – Keeps the cake tender and moist.
With these ingredients, you’ll have a soft, delicious cake base ready for stacking and decorating!
Buttercream or Alternative Frosting Options
A cake isn’t complete without a creamy, smooth frosting to bring everything together. Here are some great options:
Classic Buttercream – Rich, smooth, and perfect for piping and spreading.
- Ingredients: ½ cup (115g) unsalted butter, 2 cups (250g) powdered sugar, 1 teaspoon vanilla extract, 2–3 tablespoons milk.
Vegan Frosting – A dairy-free alternative that’s just as delicious!
- Made with plant-based butter and almond milk.
Whipped Cream Frosting – Light, airy, and slightly less sweet.
- Great for those who prefer a softer texture.
Whichever frosting you choose, make sure to chill your cake before applying for a smoother finish!
Fondant Colors & Edible Decorations
Now comes the fun part—bringing Hello Kitty to life! These decorations will help you capture her iconic look:
- 1 pound (450g) white fondant – Covers the cake smoothly, giving it a polished look.
- 2 ounces (50g) pink & red fondant – Perfect for shaping Hello Kitty’s bow!
- 2 ounces (50g) black fondant – Used for her eyes, whiskers, and details.
- 1 ounce (25g) yellow fondant – Adds the signature Hello Kitty nose.
- Edible pearls & glitter – For an extra touch of sparkle and elegance!
With these decorations, your Hello Kitty cake will look as magical as it tastes!
Tools You’ll Need for the Perfect Design
To transform simple cake layers into a stunning Hello Kitty masterpiece, having the right tools makes all the difference!
Cake Baking Essentials
These are must-haves for baking, stacking, and frosting your cake:
- Two cake pans (6-inch & 8-inch) – Creates the perfect tiered structure.
- Spatula & offset spatula – Helps spread frosting evenly.
- Cake turntable – Makes decorating much easier!
- Cooling rack – Lets the cakes cool properly before decorating.
Decorating & Sculpting Tools for the Hello Kitty Cake Topper
For those adorable Hello Kitty details, you’ll need:
- Fondant roller – Rolls out smooth fondant for a professional finish.
- Piping bags & tips – Adds delicate buttercream decorations.
- Fondant cutters & sculpting tools – Shapes Hello Kitty’s face and bow with precision.
- Edible glue or water brush – Attaches fondant decorations securely.
With the right tools in hand, you’re ready to create a showstopping Hello Kitty cake that will impress everyone!
Baking & Preparing the Cake Base
Now that we have all the ingredients and tools ready, it’s time to bake the perfect Hello Kitty two tier cake. A well-structured cake starts with evenly baked layers, proper cooling and trimming, and a smooth crumb coat to ensure a polished finish. Whether you’re making this for a birthday, baby shower, or special celebration, following these steps will give you a stable and visually appealing cake that perfectly supports the cute cake toppers you’ll add later.
Baking the Cake Layers
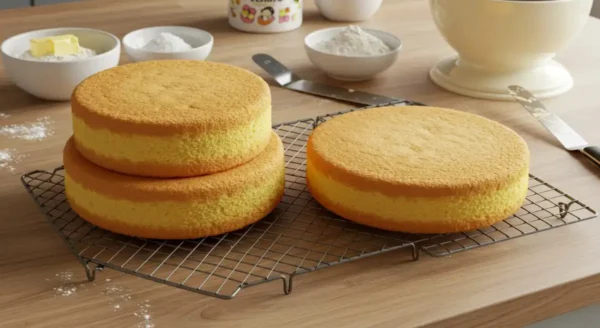
The foundation of a stunning tiered cake is its structure. If the cake is too soft, it may collapse under the weight of the top tier and decorations. Here’s how to bake layers that are sturdy, yet still deliciously moist and fluffy.
Steps to Bake a Stable Two Tier Cake
- Preheat your oven to 350°F (175°C) and grease two cake pans (one 6-inch and one 8-inch) to prevent sticking.
- Prepare the batter following the recipe, making sure all ingredients are at room temperature for even mixing.
- Divide the batter evenly between the two pans, ensuring each tier bakes at the same height.
- Bake the cakes in the center of the oven. The 8-inch cake will take about 30-35 minutes, while the 6-inch cake will take around 25-30 minutes.
- Test for doneness by inserting a toothpick into the center—if it comes out clean, the cake is ready.
- Cool completely on a wire rack before removing from the pans. Never frost a warm cake—it will cause the frosting to melt and ruin the design!
Cooling, Trimming, and Layering Tips
- Let the cakes cool completely before assembling—this prevents cracking.
- Trim the tops to create flat, even layers. A flat surface makes it easier to stack the tiers neatly.
- Chill the cake layers for at least 30 minutes before frosting—this firms them up for easier handling.
Applying the Crumb Coat & Frosting
A crumb coat is a thin first layer of frosting that seals in loose crumbs, creating a smooth base for the final decoration. This step ensures a polished, professional look that highlights your Hello Kitty theme beautifully.
How to Apply a Flawless Crumb Coat
- Place the first cake layer on a cake board or stand.
- Spread a thin layer of buttercream on top, then stack the second layer. Repeat with the top tier.
- Apply a thin layer of frosting over the entire cake using an offset spatula. Don’t worry about crumbs—this layer is meant to lock them in.
- Smooth it out using a bench scraper or a spatula.
- Chill the cake for 20-30 minutes to let the crumb coat set before adding the final frosting layer.
Frosting Techniques for a Professional Finish
- Use a turntable to apply frosting evenly and create smooth edges.
- Work in layers—apply a thin layer first, let it chill, then add a second coat for the final finish.
- Experiment with textures—smooth buttercream for a sleek look or piped decorations for added detail.
Once your cake is covered and perfectly frosted, it’s ready for the fondant and decorations in the next step.
Covering & Decorating the Cake
Now comes the fun part! Your Hello Kitty two tier cake is baked, layered, and frosted. Now, it’s time to bring it to life with fondant and decorations. A smooth fondant finish gives your cake a professional look, while the right details add charm and personality. Let’s get started!
Covering the Cake with Fondant
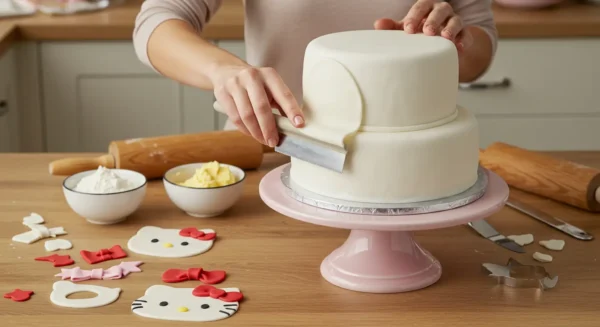
Fondant makes your cake look smooth and polished. If you’ve never worked with it before, don’t worry! Follow these simple steps, and you’ll get a flawless finish in no time.
Step-by-Step Guide to a Smooth Fondant Finish
- Knead the fondant. Work it until soft and stretchy. This prevents cracks.
- Roll it out. Dust your surface with cornstarch. Roll the fondant into a thin, even layer about 1/8 inch thick.
- Cover the bottom tier. Drape the fondant over the 8-inch cake. Smooth it gently from the center outward. Trim the extra fondant.
- Cover the top tier. Repeat the process for the 6-inch cake. Make sure both tiers look seamless.
- Stack the layers. Place the top tier on the bottom tier using cake dowels or straws for support.
Colors & Cute Design Ideas
White fondant for Hello Kitty’s signature clean look.
Pink and red details for a fun, kawaii touch.
Fondant bows, hearts, or stars to make the cake stand out.
Now that your cake is covered, it’s time for the best part—decorating!
Adding Cute Hello Kitty Details
This is where your cake gets its Hello Kitty charm! Small details make a big difference. Let’s add those finishing touches.
Creating Hello Kitty’s Signature Look
- Face details: Cut black fondant ovals for the eyes. Add a tiny yellow oval for the nose. Use thin strips of fondant for the whiskers.
- The iconic bow: Shape pink fondant into two loops with a small center knot. Place it on the top tier.
- Extra cute elements: Use edible pearls, gold dust, or mini hearts to enhance the look.
Piping & Stencil Ideas for Extra Cuteness
Buttercream borders – Pipe small pink swirls for a soft, dreamy touch.
Sugar stencils – Lightly dust powdered sugar over a stencil for polka dots.
Personalized message – Pipe a name or a short message for a custom touch!
With all the details in place, your Hello Kitty two tier cake is now ready! It’s cute, elegant, and celebration-ready. Get your camera—it’s time for pictures before serving!
Creating & Placing the Matching Cake Topper
A Hello Kitty cake topper is the finishing touch that makes your cake truly special! Whether you make one from fondant, gum paste, or use a plastic figurine, the topper adds personality and charm. Follow these steps to create and place the perfect topper.
How to Make a DIY Hello Kitty Cake Topper
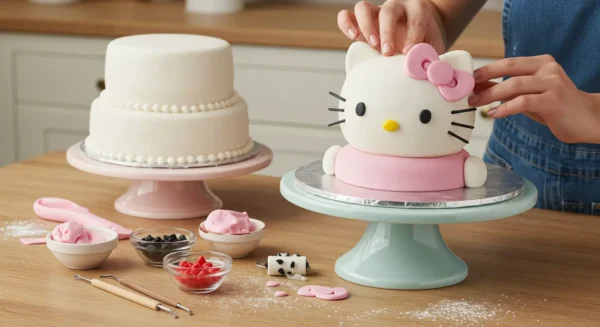
Creating your own Hello Kitty cake topper is fun and rewarding! You get full control over the size, color, and details. Let’s get started.
Choose Your Material
- Fondant or gum paste – Great for an edible topper with a smooth, professional look.
- Plastic figurine – A reusable option that doubles as a keepsake.
Shape Hello Kitty’s Features
- Make the head. Roll white fondant into a smooth ball and gently flatten it.
- Create the face. Use black fondant to cut out small ovals for the eyes. Add a tiny yellow oval for the nose. Roll out thin black strips for the whiskers.
- Form the signature bow. Shape pink fondant into two loops and a small center knot. Attach it to the top left side of Hello Kitty’s head.
- Let it dry. Allow the topper to firm up for a few hours before placing it on the cake.
Positioning the Cake Topper on the Two Tier Cake
Now that your Hello Kitty topper is ready, let’s place it securely on your cake.
Best Placement Techniques for Balance & Stability
- For edible toppers: Gently press the topper into the top tier. Secure it with a toothpick or a small amount of edible glue.
- For non-edible figurines: Use a small fondant base underneath to prevent slipping.
- Check for stability. Make sure the topper is centered and balanced to keep it in place throughout the event.
With the topper in place, your Hello Kitty two tier cake is officially complete! Step back, admire your creation, and get ready for the compliments. Your cake is now party-ready!
Final Touches & Presentation for Your Hello Kitty Two Tier Cake
Your Hello Kitty two tier cake is almost ready, but a few finishing touches can take it from beautiful to breathtaking. Whether you want to add an extra sparkle, personalize it with a name, or ensure it stays fresh after the celebration, these last steps will make all the difference.
Adding Extra Decorations for a Wow Effect
A cake isn’t just about taste—it’s also about presentation. These final decorations will give your cake a professional, polished look that will impress your guests.
Make It Shine with Edible Accents
- Edible glitter: Lightly dust gold or silver edible glitter over the cake for a magical sparkle.
- Pearl dust: Use a soft brush to apply pearl dust to the fondant for an elegant finish.
- Small sugar bows: Place tiny fondant bows around the cake’s edges to enhance the Hello Kitty theme.
Personalize It with a Custom Touch
- Add a name or message: Use fondant letters or pipe a message with buttercream to make the cake extra special.
- Use themed cake toppers: Consider adding small fondant figurines or decorative accents that match the party’s theme.
The little details matter. These elements make your Hello Kitty two tier cake look celebration-ready!
How to Serve & Store Your Hello Kitty Two Tier Cake Properly
Now that your cake is fully decorated, it’s time to think about serving and storing it properly. You’ve put in a lot of effort—let’s make sure every slice is just as perfect as the first!
Best Way to Cut and Serve a Two Tier Cake
- Remove the top tier first. Carefully lift it off and place it on a separate plate for cutting.
- Cut the bottom tier next. Use a sharp knife to cut even slices so everyone gets a perfect piece.
- Serve with care. Offer slices on decorative plates to showcase your beautiful cake.
Storing Leftovers to Keep the Design Intact
- Refrigerate properly: If your cake has buttercream, store it in an airtight container in the fridge.
- Wrap fondant-covered cake carefully: Use plastic wrap to keep moisture in without damaging the decorations.
- Freeze for later: For longer storage, wrap slices tightly and freeze them for up to three months.
With these final steps, your Hello Kitty two tier cake is not only a masterpiece but also ready to be enjoyed and preserved.
Proper cake storage is essential to keep your Hello Kitty two tier cake fresh and safe to eat. Whether you’re refrigerating leftovers or freezing slices for later, following food safety guidelines ensures the best taste and texture. For expert advice on proper food storage and safety, check out this official guide from the FDA:
Show Off Your Stunning Hello Kitty Two Tier Cake!
You did it! After all the mixing, rolling, decorating, and fine-tuning, your Hello Kitty two tier cake is complete! Every detail—the smooth fondant, the adorable decorations, and of course, the perfectly placed Hello Kitty cake topper—has come together beautifully. Now, it’s time to step back, admire your work, and most importantly, enjoy it!
Take a moment to appreciate how far you’ve come. You started with just ingredients and a vision, and now you have a stunning cake that looks like it came straight from a bakery. Whether you made it for a birthday, baby shower, or just for fun, this cake is more than a dessert—it’s a labor of love, a centerpiece, and a sweet memory waiting to happen. You can already imagine the smiles, the excitement, and the joy when everyone sees it for the first time!
Keep Experimenting & Have Fun!
Baking is all about creativity—so why stop here? Now that you’ve mastered this Hello Kitty two tier cake, why not try something new? Play around with different colors, unique toppers, or even an extra tier for an even more dramatic effect. Maybe next time, you’ll add a chocolate filling, a rainbow sponge, or delicate buttercream flowers. There’s always another way to make your cakes even more magical!
Looking for more fun and Hello Kitty cake inspiration? Here are some ideas to spark your creativity:
- Hello Kitty Cake: Top 10 Stunning Cakes for All Celebrations!
- Classic Hello Kitty Cake: How to Make a Stunning Cake
- Hello Kitty Cake: The Most Ultimate Fondant Face Cake!
Show Off Your Creation!
We’d love to see your Hello Kitty masterpiece! Snap a picture, post it on social media, and don’t forget to tag us. If you experimented with something unique—maybe a different topper, a fun color scheme, or a special decoration—share your experience!
Baking is about more than just cake—it’s about creativity, joy, and making something special for the people you love. So, grab a slice, enjoy every bite, and start dreaming up your next baking adventure!
FAQ: Your Questions About Making a Hello Kitty Two-Tier Cake Answered!
Creating a Hello Kitty two tier cake is exciting, but it’s natural to have questions along the way. Whether you’re wondering how to cut it properly or how to keep it stable, we’ve got you covered! Here are some of the most common questions bakers ask when making a two tier cake with a Hello Kitty cake topper.
How do you cut a two-tier cake?
- Cutting a two-tier cake properly ensures neat slices and a stable presentation. Follow these steps for the best results:
Remove the top tier first. Carefully lift it off and place it on a separate plate for cutting. - Cut the bottom tier next. Use a sharp knife to cut even slices from the outer edge, moving inward.
- Use a cake server to lift slices onto plates without ruining the structure.
For extra precision, use a warm knife (run it under hot water and dry it) to make clean, smooth cuts through fondant and buttercream.
What can I use to support a two-tier cake?
A two-tier cake needs proper support to prevent it from collapsing. You can use:
- Cake dowels or straws: Inserted into the bottom tier, they help distribute the weight of the top layer.
- Cake boards: Placing a thin cake board under the top tier prevents it from sinking into the lower cake.
- Chilled cake layers: Slightly firm cakes hold up better than soft, fragile ones, making stacking easier.
For extra stability, gently press the top tier into place after stacking, ensuring everything stays secure.
How many layers should a two-tier cake have?
A two-tier cake usually has:
- Two to four layers per tier. A standard design includes two layers per tier, but you can add more for height.
- Buttercream or filling between each layer to add stability and flavor.
- A thicker bottom tier to support the weight of the top tier and decorations.
If using heavier decorations or a Hello Kitty cake topper, consider making each tier at least 4 inches tall for a well-balanced cake.
Can I use a plastic Hello Kitty cake topper on a fondant cake?
Yes! A plastic Hello Kitty cake topper is a great way to add charm without extra effort. To attach it securely:
- Place a small fondant or buttercream base under the topper to prevent slipping.
- Use a toothpick or food-safe skewer if the topper needs extra support.
- Check the weight of the topper—if it’s too heavy, it may need a dowel to keep it upright.
For an edible option, consider making a fondant or gum paste topper to match your cake perfectly!
How do I store leftover Hello Kitty cake?
To keep your Hello Kitty two tier cake fresh, follow these storage tips:
- At room temperature: If unfrosted or lightly covered in buttercream, store in an airtight container for up to two days.
- In the refrigerator: If covered in fondant or perishable frosting, refrigerate in a cake box or lightly wrapped in plastic wrap.
- In the freezer: Wrap leftover slices in plastic wrap and store them in an airtight container for up to three months.
Before serving, let the cake sit at room temperature for about 30 minutes to restore its texture and flavor.





No comment yet, add your voice below!