Haunted Graveyard Pudding Cups are a delightful and spooky twist on the classic dessert that will impress both kids and adults alike at any Halloween gathering. I remember making these fun treats with my family every October, enjoying the simple process of layering chocolate pudding with crushed cookies to create a delicious “graveyard” effect. The combination of smooth chocolate pudding, crunchy cookie dirt, and colorful gummy worms is not just visually appealing but irresistibly delicious. This recipe is perfect for any Halloween party or get-together and will surely evoke memories and laughter, making dessert a highlight of the evening.
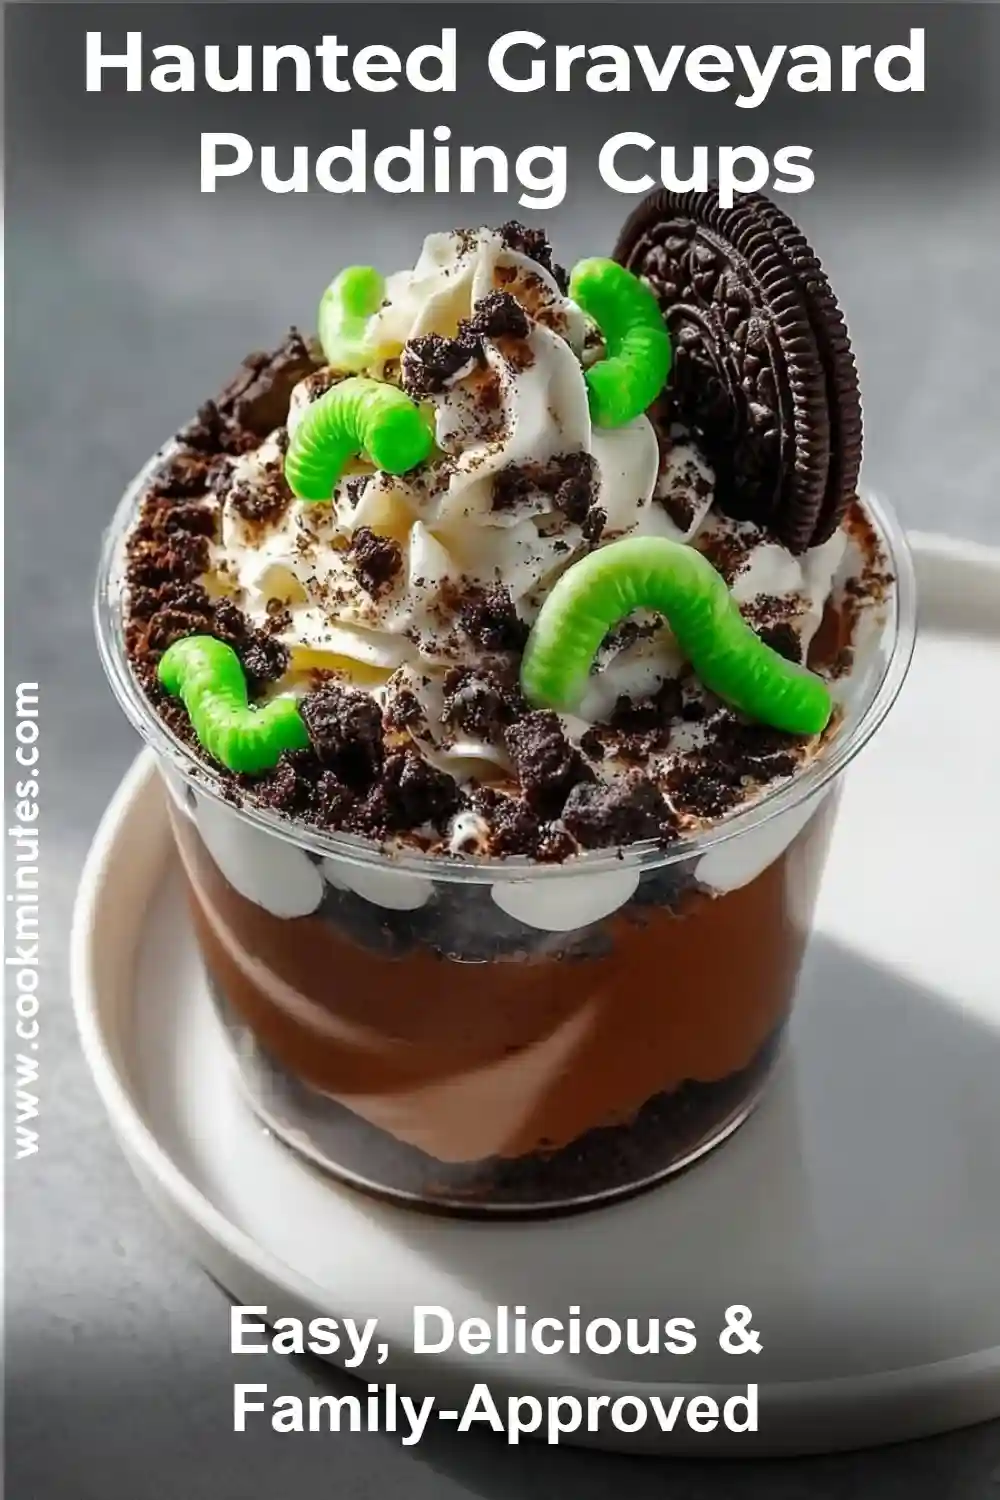
Table of Contents
Origin of the Recipe
The Haunted Graveyard Pudding Cups are a playful creation within the vast repertoire of Halloween-themed treats, which have garnered a fun reputation for their whimsical and interactive components. As Halloween became increasingly commercialized in the late 20th century, these desserts gained popularity at parties and in classrooms, delighting children and adults alike. In many households, as soon as autumn rolls in, families start crafting themed treats, transforming ordinary recipes into spooky sensations.
This fun dessert encapsulates the spirit of Halloween, the thrill of ghosts and goblins combined with the delight of spreading joy through food. You’ll find many variations of spooky desserts, but few are as easy and fun as these pudding cups. The ingredients are simple, and the assembly can be a fun family activity. It’s after-school treats like these that become tradition in many families, binding them together in the spirit of festivity. With just a few ingredients, this recipe brings creativity alive, allowing each person to design their own spells of eerie delight.
As you bring out the chocolate pudding and cookies, think of how these delightful creations echo historical Halloween festivities. It’s a wonderful time to discuss with children how these celebrations used to focus on community bonding, light-hearted scares, and the joy of indulging in treats. If you’re interested in exploring more Halloween fun, check out this comforting recipe for an inspiring treat to accompany your spooky desserts.
Print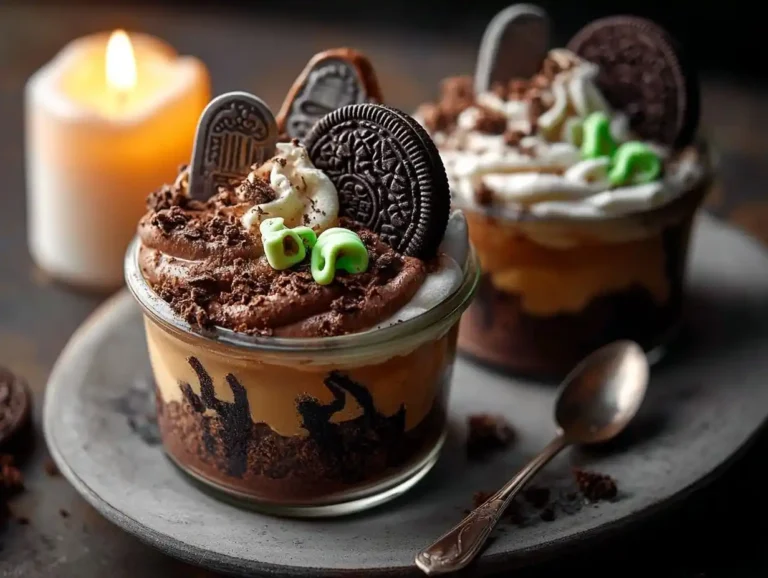
Haunted Graveyard Pudding Cups Recipe
5 Stars 4 Stars 3 Stars 2 Stars 1 Star
No reviews
These Haunted Graveyard Pudding Cups are a spooky and fun Halloween treat made with chocolate pudding, crushed Oreos, and candy decorations. Perfect for parties or a festive family dessert!
- Total Time: 15 minutes
- Yield: 8 servings 1x
Ingredients
2 cups cold milk
1 packet instant chocolate pudding mix (3.9 oz)
8 Oreo cookies, crushed
1/2 cup whipped topping (like Cool Whip)
4 small plastic cups (5–6 oz size)
Halloween candy decorations (gummy worms, candy pumpkins, cookie tombstones, candy eyes)
Instructions
- Prepare the pudding: In a mixing bowl, whisk together cold milk and pudding mix until thickened, about 2 minutes. Let sit for 5 minutes to fully set.
- Crush the cookies: Place Oreos in a plastic bag and crush them using a rolling pin to create edible “dirt.”
- Layer the cups: Divide pudding between cups. Top each with a layer of crushed Oreos to resemble soil.
- Decorate the graveyard: Add Halloween candies like gummy worms, tombstone cookies, candy eyes, and pumpkins to create a spooky graveyard scene.
- Chill and serve: Refrigerate for at least 30 minutes before serving to let flavors meld and the pudding set firmly.
Notes
Customize with any spooky candies you like! Kids will love decorating their own graveyard cups. Can be made a day in advance.
- Author: Sarah Mitchell
- Prep Time: 15 minutes
- Cook Time: 0 minutes
- Category: Dessert
- Method: No Cooking
- Cuisine: American
- Diet: Vegetarian
Nutrition
- Serving Size: 1 cup
- Calories: 250
- Sugar: 24g
- Sodium: 250mg
- Fat: 9g
- Saturated Fat: 3g
- Unsaturated Fat: 4g
- Trans Fat: 0g
- Carbohydrates: 38g
- Fiber: 1g
- Protein: 4g
- Cholesterol: 10mg
Why this recipe works
The Haunted Graveyard Pudding Cups work so well due to their combination of flavors and textures, not to mention their engaging presentation. The creamy richness of chocolate pudding pairs harmoniously with the crunchy texture of chocolate cookies and the playful addition of gummy worms. It’s a simple yet powerful interplay of textures that captivates any dessert lover. Here’s why you’ll love this recipe:
Quick and Easy to Create
With just a few ingredients and very little preparation time, you can create something that looks incredibly impressive. The only required cooking is whisking the pudding mix with milk, and from there, it’s all about layering and adding fun details. You’ll have eight spooky servings ready in under 30 minutes, making these pudding cups a fantastic last-minute option if you’re hit by a Halloween party surprise.
Customizable Designs
The real beauty of these pudding cups lies in how you can customize them. Beyond the basic decorations, you can use various cookie types, pudding flavors, and decorative elements like edible glitter, candy eyes, or chocolate bones to craft a unique dessert each time. With a little creativity, you can turn this dessert to match any party theme!
Interactive Fun for All Ages
This is a dessert that invites everyone to get involved, especially the little ones. Watching children get excited while decorating their own “graveyards” with gummy worms and cookie “tombstones” creates a playful experience. Plus, it helps build valuable skills like dexterity and creativity in kids while ensuring they enjoy something that looks as good as it tastes. While preparing pudding cups, you might want to prepare a batch of these yummy Snickers bars to keep everyone occupied and engaged in kitchen fun.
Step-by-Step Instructions + Tips
To make the Haunted Graveyard Pudding Cups, you’ll need to follow some simple steps that ensure a delicious and spooky outcome. Trust me, it will be worth the effort! Here’s how to do it seamlessly:
Prep the Pudding
In a large mixing bowl, start by whisking 3 cups of cold whole milk with a package of instant chocolate pudding mix for about 2 minutes. The mixture should become smooth and thick. Once mixed, allow it to set for 5 more minutes to reach the perfect consistency.
| Ingredient | Quantity |
|---|---|
| Cold Whole Milk | 3 cups |
| Instant Chocolate Pudding Mix | 1 package (4 oz) |
| Chocolate Sandwich Cookies | 18, crushed |
| Oval-shaped Chocolate Cookies/Biscuits | 8 |
| Whipped Cream/Whipped Topping | 1/2 cup |
| Assorted Gummy Worms | As desired |
| Black Decorating Gel/Edible Marker | For decoration |
| Green Sprinkles/Dyed Shredded Coconut | Optional, for decoration |
Layering the Cups
Now it’s time to assemble the pudding cups! Evenly divide the thickened pudding into 8 small clear cups or jars. It’s essential to make sure you put enough pudding in each container to keep the layering uniform and visually appealing. After this, sprinkle a generous layer of crushed chocolate sandwich cookies on top of the pudding to create the effect of dirt.
Finishing Touches
Next, take your oval-shaped cookies and using a black decorating gel or edible marker, write spooky messages such as “RIP” on each cookie. Insert these decorated cookies vertically into each cup, creating the look of gravestones. Finish up with gummy worms wriggling out of the pudding, a dollop of whipped cream on top, and green sprinkles or shredded coconut for added color. Very spooky indeed, right?
Once you’ve assembled your haunted delights, place the cups in the refrigerator until you’re ready to serve, ensuring they stay chilled and fresh for Halloween fun!
Variations & Serving Ideas
The flexibility of Haunted Graveyard Pudding Cups means you can easily incorporate different flavors and elements for a unique twist every time. Here are some fun variations you can try:
Flavorful Pudding Choices
Instead of the classic chocolate pudding, you could mix it up by using vanilla or butterscotch pudding. This way, you can still keep the cookie topping while adding a new flavor profile that might surprise your guests!
Additional Decorations
Playing with decorations can lead to even more fun. Consider adding candy decorative bones or little pumpkin candies for an additional Halloween flair. Kids love the interactive nature of these desserts, and with a little creativity, every cup can become a unique masterpiece!
| Decoration Idea | Description |
|---|---|
| Candy Bones | Sprinkle around the cups for a gruesome touch. |
| Pumpkin Candies | Place on top or beside for a fun Halloween element. |
| Chocolate Sprinkles | Use instead of green sprinkles for a darker effect. |
Mini Pumpkin Cups
For a delightful surprise, serve the pudding cups in mini pumpkin-shaped containers. It adds a charming touch to your Halloween table and doubles as a cute decoration!
Final Thoughts
As the Halloween season approaches, Haunted Graveyard Pudding Cups will undoubtedly become a favorite among your family and friends. This recipe stands out for its simplicity and the joy it brings when enjoyed together. The merriment of designing your spooky creations can spark conversations, laughter, and of course, delicious savories! Don’t hesitate to make this recipe a classic in your Halloween traditions. As you watch your pudding cups disappear, remember that creating delightful food experiences is as much about the fun in making them as it is about the flavors. If you want more culinary delights to share, you might also be inspired by this Recipe for delicious soup. Happy Halloween!
Looking for even more enjoyable content? You can explore further on Pinterest for ideas and inspiration here.
FAQ
Can I use dairy alternatives for the pudding?
Yes, you can substitute whole milk with any dairy alternative like almond, soy, or oat milk, but make sure the pudding mix you choose is compatible with dairy-free options. Most instant pudding mixes work well with alternative milks, ensuring no one misses out on these fun cups.
How long can I store the pudding cups?
Pudding cups can be stored in the refrigerator for up to 3 days. However, it’s best to add the toppings like whipped cream and gummy worms right before serving to keep them fresh and prevent sogginess.
Can I make these pudding cups ahead of time?
Absolutely! You can prepare the chocolate pudding and layer the cups a day in advance. Just add your decorative touches right before serving to keep the presentation fresh and spooky.
Can I use different cookie types as the “dirt”?
Certainly! While chocolate cookies create the classic look, you could also use crushed graham crackers or vanilla wafers for a lighter “dirt.” Just ensure that the flavor complements the chocolate pudding.
What other themes can I create with these cups?
The possibilities are endless! Try using different colors of pudding and decorations for other holidays; for instance, red and green for Christmas or blue and yellow for a sunny summer theme. The concept can easily transform to celebrate any occasion!








No comment yet, add your voice below!